
Python for data science tutorial (Complete guide with examples and notebook)


This article will dive into fundamental Python concepts you need to understand before using Python for data science and machine learning. Let's dive right in!
What is Python?
Python is the language of preference for most data scientists. It is a general-purpose, high-level programming language that supports object-oriented, structured, and functional programming paradigms.
Why is Python preferred for data science?
Although Python is not the only language used for data science, it stands out for various reasons. Let's look at some of them:
- Python has a simple and easy-to-learn syntax.
- Popular data science libraries such as NumPy and Pandas are written in Python.
- Large ecosystem of tools such Jupyter Notebooks and Google Colaboratory for data science tasks.
- Python being open source gives beginners and professionals access to a pool of learning resources.
- Python is well supported by communities and forums that provide beginners and professionals a platform to discuss and solve problems.

Complete Data Science & Machine Learning Bootcamp in Python
This course teaches you how to get started in data science. You don't need any programming prior knowledge. We'll teach you the Python basics you need to get started. Here are some of the items we will cover in this course
- The Data Science Process
- Python for Data Science
- NumPy for Numerical Computation
- Pandas for Data Manipulation
- Matplotlib for Visualization
- Seaborn for Beautiful Visuals
- Plotly for Interactive Visuals
- Introduction to Machine Learning
- Dask for Big Data
- Power BI Desktop
- Google Data Studio
- Association Rule Mining - Apriori
- Deep Learning
- Apache Spark for Handling Big Data
The course also contains exercises and solutions that will help you practice what you have learned.
Anaconda installation
For this tutorial, you will download and install Anaconda. It is an open-source distribution of Python for data science and machine learning applications. Anaconda ships popular data science and machine learning packages.
Install Anaconda on Windows
Follow the steps below to install on Windows.
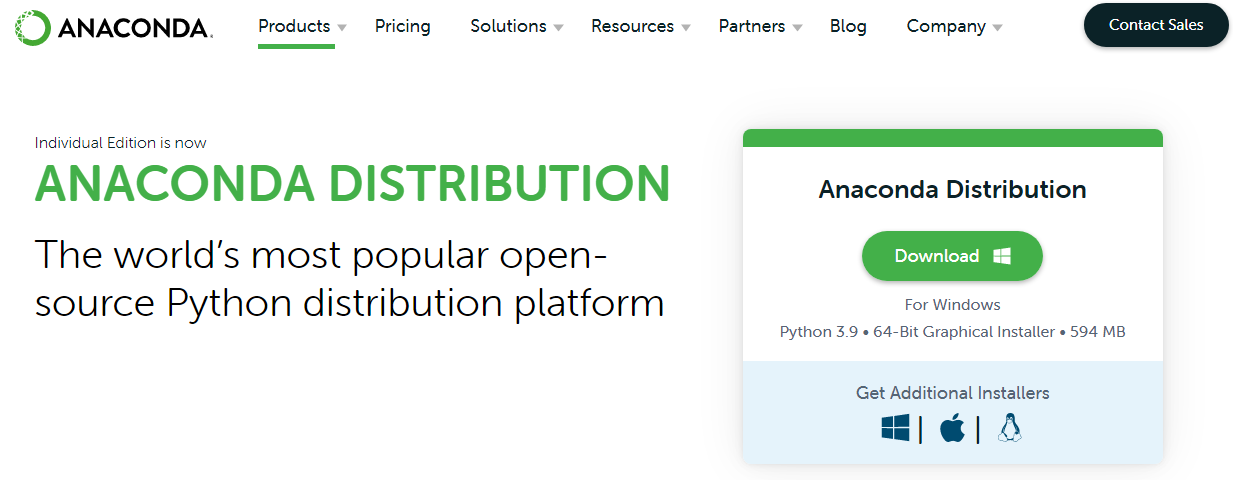
- Head over to anaconda.com and download the Anaconda installer.
2. Run the installer to begin the installation process.
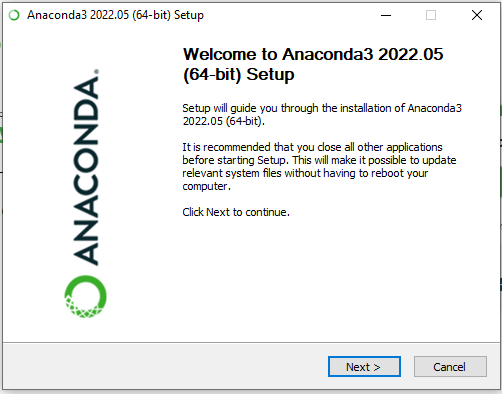
3. Click Next and agree to the license agreement.
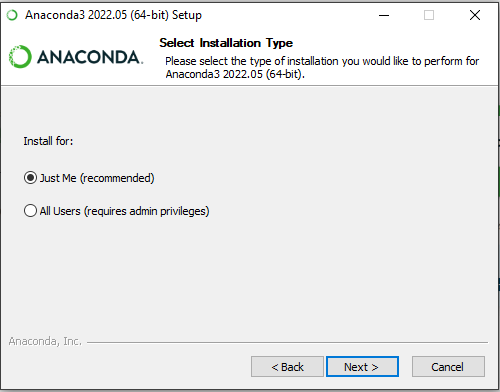
4. Select the installation type. Choose 'Just Me' if the software will be used by a single user and click Next.
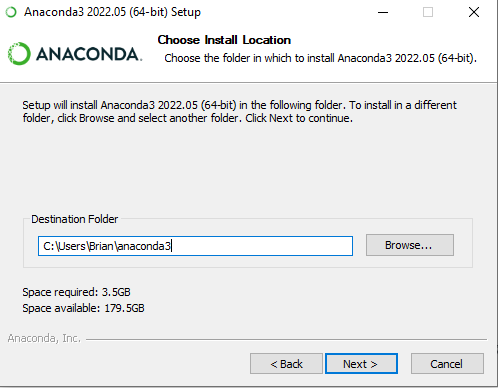
5. Choose the installation location. You can leave it just as it is and click Next.
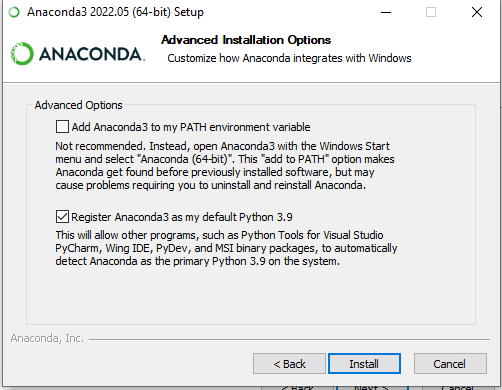
6. On the advanced installation option, choose the second option and click 'install' to start installing.
Install Anaconda on Linux and macOs
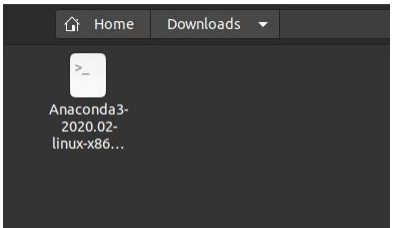
Open a terminal in the folder where Anaconda was downloaded, usually the downloads folder. Right-click while in the downloads folder and press on Open in Terminal.
Run this command on the Terminal. Notice the dot before the slash and no space in between.
./Anaconda3-022.05-linux-x86_64.shShould you get a permission error, start by changing the permission to make the file executable
chmod 777 Anaconda3-022.05--linux-x86_64.shThen run the installer again ./Anaconda3-022.05-linux-x86_64.sh .Replace Anaconda3-022.05-linux-x86_64.sh with the name of the file you downloaded. The assumption is that you are working on a local machine and not a server.
Launching Jupyter Notebook on Anaconda
After installation, it's time to launch the Jupyter Notebook and write your first Python program.
You can launch it in three ways:
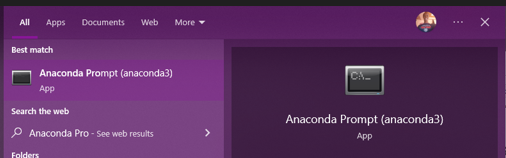
1. Anaconda Prompt
Go to the Windows Start Menu and search Anaconda Prompt and run it.
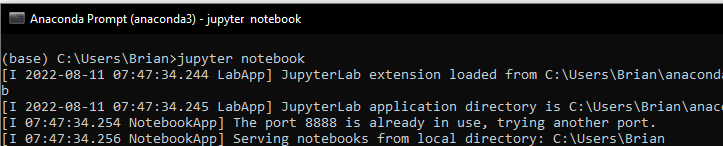
Once it is open type 'jupyter notebook'. It will open a link in your default browser.
2. Windows Start Menu
On the Windows Start Menu, search Jupyter Notebook and run it. It also opens a link on your default browser.
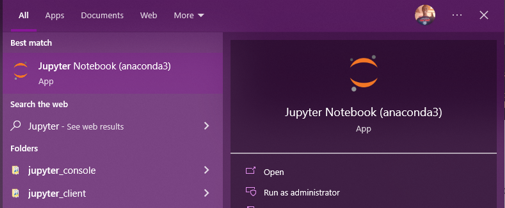
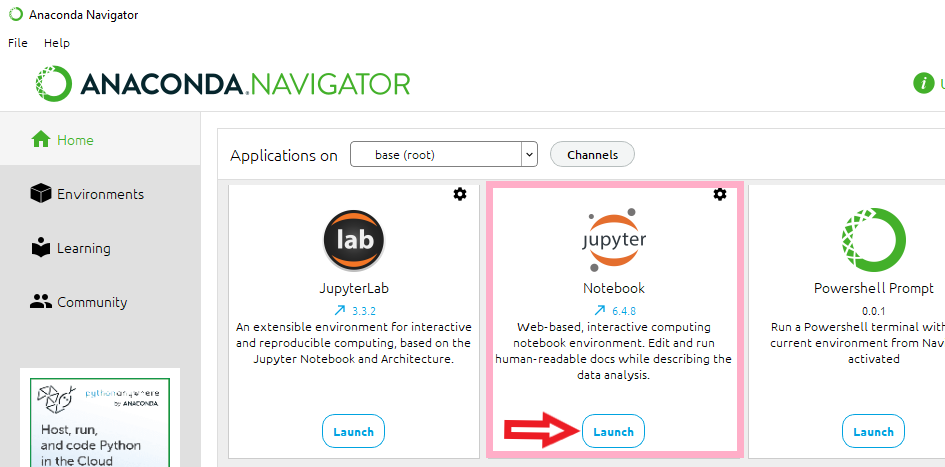
3. Anaconda Navigator
On the Windows Start Menu, search Anaconda Navigator and run it. Trace the Jupyter Notebook and click Launch.
The steps are the same on Linux and macOs.
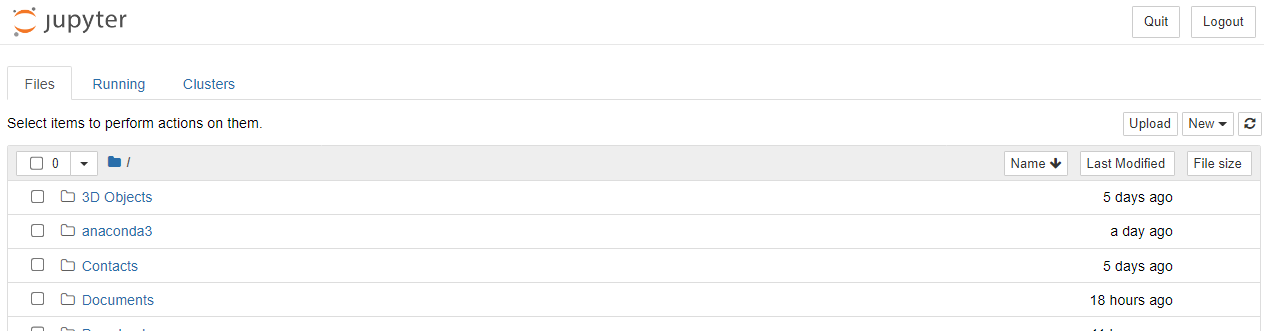
Getting started with Jupyter Notebook
Once you have launched the Jupyter Notebook with either of the methods above, you will be taken to the Jupyter file browser.
In the upper right corner, click [New] -> [Python3] to open the Jupyter Notebook.
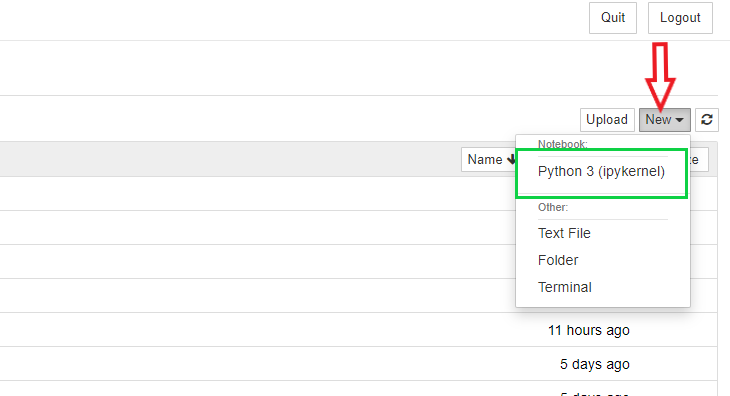
The Jupyter Notebook will open in a new tab.
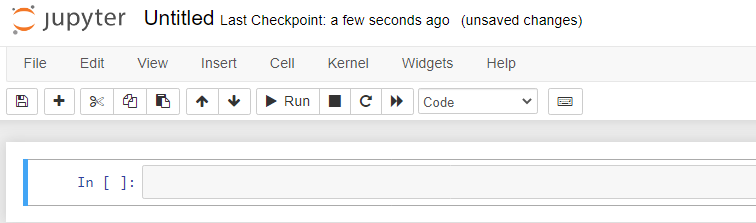
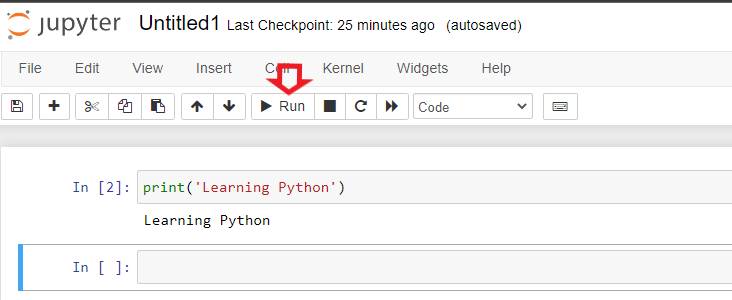
The notebook contains cells where you will write your code. To run code in the cell use Shift + Enter(creates a new cell) or Ctrl + Enter(doesn't create a new cell) or click Run(pointed below).
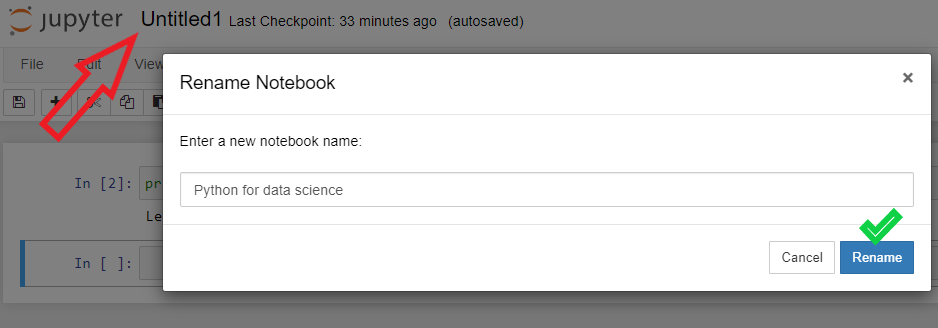
To Rename your notebook, click on 'Untitled' and give it a name.
To save the Notebook, click on File in the top left corner and click Save As.
Python syntax
Python has a very straightforward easy-to-understand syntax. You only need a single-line statement to execute your first python program. Run your first program by simply writing print('Learning Python') and press shift + Enter run the cell.
print('Learning Python')
Python comments
In Python, a hash(#) sign begins a comment. The Python interpreter ignores all characters after the hash sign. Comments are crucial when writing code in several ways, some of which are:
- Comments explain code to other developers who view the code.
- They prevent the execution of some code.
- They make code more readable.
For example, in the code below, the first print('Learning Python') statement will not be executed.
# print('Learning Python')
print('Learning Python')
A comment can also be included after a statement. The rest of the line from the # sign is ignored.
print('Learning Python') # Python is great
You can also do a multiline commenting:
# Comment 1
# comment 2
# Comment 3
# Comment 4Or:
'''
This is a multiline comment
with a triple- quoted string
'''
Since Python has no proper syntax for applying multiline comments like in other languages like C, we can use the triple-quoted string.
Indentation and whitespace
While other languages use semi-colons to distinguish statements, Python builds its code structure using whitespace and indentations. Let's see this in the following code snippet. Do not worry if you don't understand it for now.
marks = [40, 50, 60, 30, 15, 100, 12, 35]
for mark in (marks):
	if i < 50:
    	print(mark)
Notice that we have not used semi-colons at the end of each line, and the code is formatted with indentations.
Python variables
Variables in Python are reserved memory locations to store values. While you can use the $ command to declare a variable in PHP, Python has no command to do so. A Python variable is instantly created when you assign a value to it. The equal (=) sign is the assignment operator, and assigns the value to the variable with the syntax variable_name = value.
quantity = 200 #integer
temp = 45.8 #floating point
course = "Python" # string
arr = [20,30] #list

print(quantity)
print(temp)
print(course)
print(arr)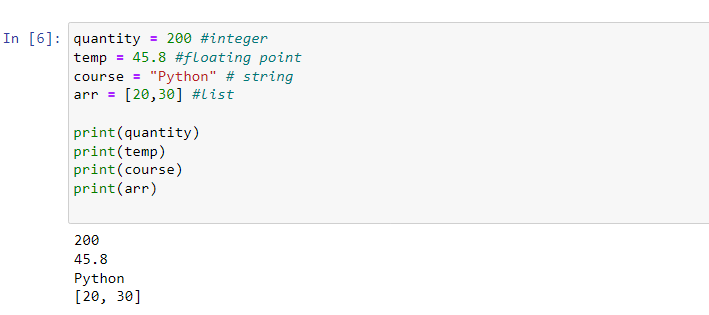
Rules for naming variables
Failure to follow variable naming rules results in errors. Keep these rules in mind when creating variables in Python:
- Variable names can contain numbers, underscores, or letters but can't start with a number.
- Variable names are case sensitive where a variable name temp is not the same as TEMP.
- They can not contain spaces. To connect two words, use the underscore (_); for example,
fruit_quantity.
Python data types
Variables can store data of various types. Below are data types in Python.
- Numeric data types:
int,float,complex - String data types:
str - Sequence types:
list,tuple,range - Mapping type:
dict - Boolean type:
bool - Set types:
set,frozenset
To get the data type of any object, we use the type() function:
type(quantity)
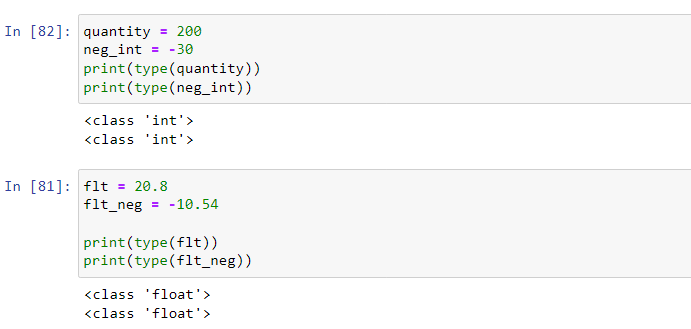
Python numeric data types
Python numeric types are immutable data types that store numbers. They are created when you assign a value to them.
quantity = 200 # int
complx = 10 + 8j # complex
flt = 20.8 # float
str = 'Python for data science'
An integer (int) is a negative or a positive number without decimals.
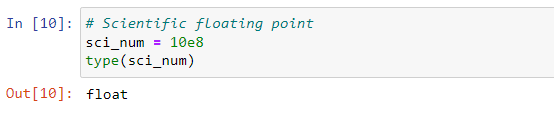
A float (floating point number) is a negative or positive number with decimals.
Floating point numbers can also be scientific numbers with e to indicate the power of 10.
A complex number is a number written with a 'j' which is the imaginary part.

Explicit type casting
Types can be converted from one to the other through type casting. Python does implicit type conversion when we create a variable and assign a value to it. Explicit type conversion means that we convert the types ourselves. This conversion is achieved using type functions.
Convert float to int:
flt_to_int = int(flt) # convert float to int
print(type(flt_to_int))
Convert int to float:
int_to_float = int(quantity)

print(type(int_to_float))
Convert float to complex:
# convert float to complex
flt_to_cmplx = complex(flt)
print(flt_to_cmplx)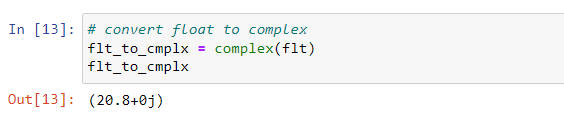
Python boolean types
The boolean type is used to represent the truth values of expressions. It represents one of two types that is True or False.
A boolean answer is returned when comparing two values in an expression. Let's see the example below.
print(68 > 79)
print(68 < 79) 
Python has a function called bool() that can help us to evaluate if a value is True or False. We shall look at it later.
We can print a message based on the truth value of an expression:
mark1 = 68
mark2 = 79
if mark1 > mark2:
	print('mark1 is larger')
else:
	print('mark2 is larger')
The bool() function
To get whether a value is True or False, use the bool() function.
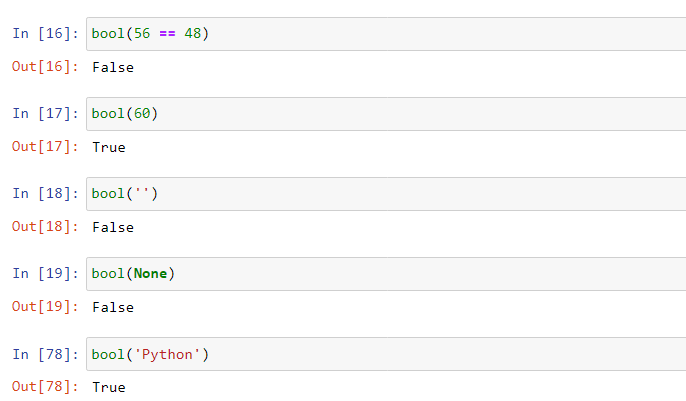
It is apparent in the above code snippets that some values will evaluate to False and others True. Let's look at the Falsy values.
Falsy and Truthy values
Falsy values evaluate as False and Truthy values evaluate as True. The following are the Falsy values. All other values apart from the ones below will be Truthy:
- Zero(0) –
bool(0) False–bool(False)None–bool(None)- An empty string(' ') –
bool(' ') - An empty list
[]–bool([]) - An empty tuple
()–bool(()) - An empty dictionary
{}–bool({})
Python operations
Python operators perform operations between operands. Python has a variety of operators. Let's look at some of them.
Arithmetic operators
These operators perform arithmetic operations on two operands. They include:
-
+- addition. Adds two operands, e.g.,20 + 5. -
-- subtraction. Subtracts two operands, e.g.,40-10. -
/- divide. It returns the quotient after the first operand is divided by the second operand, e.g.,80 / 4returns 20. -
*- multiplication. Multiplies two operands and returns their product, e.g.,5*3returns 15. -
%– modulus. It returns the remainder after dividing the first operand with the second operand, e.g.,10 % 4returns 2 as the remainder.
Comparison operators
These operators compare the values of two operands and return either True or False. They include:
==– checks if two operands are equal; if they are, it returns True. eg10 == 10is True.!=– not equal to operator. Checks if two operands are not equal, and if they are it returns True. eg30 != 29True.<– less than operator. It returns True if the first operand is less than the second operand. eg20 < 15is True.-
>– greater than operator. It is the vice versa of the less than operator. <=– less or equal to operator. It returns True if the first operand is less or equal to the second operand. eg15 <= 16is False.>=– greater than or equal to operator. It is the vise versa of the less than or equal to operator.
Assignment Operators
These operators assign the value of the right expression to the left operand. They include:
=– it assigns values from right side operands to left side operands. egc = 30. It assigns 30 toc.+=– increases the value of the left operand by the value of the right operand and assigns the modified value back to the left operand. eg, ifj = 0andi = 10thenj += iwould be equal toj = j+iequal to 10.-=– it is the vice versa of+=.*=– multiplies the value of the left operand by the value of the right operand and assigns the modified value back to the the left operand. e.g, ifj = 3andi = 10thenj *= i would be equal to j = j * iequal to 30.
Logical Operators
These are used in an expression to make decisions. They include:
and– logical AND. A condition becomes True if both operands are True.or– logical OR. A condition becomes True if any of the operands has a non-zero value.not– logical NOT. It reverses the logical state of its operand. e.g, if expression j is True, thennot(j)makes it False.
Python lists
A list is one of Python's most basic types of sequence data structures. It is written as comma-separated values inside square brackets and can contain items that are not the same type.
The square bracket [] indicates a list. Example:
sample_list1 = ['Bungalow', 'Cottage', 'Cabin', 1997, 2000]
sample_list2 = [30, 40, 100, 60]

print(sample_list1)
print(sample_list2)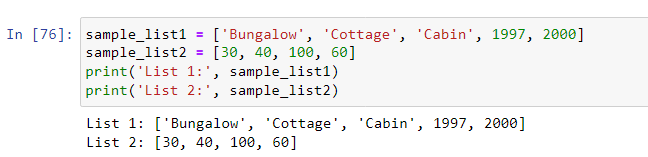
Features of a list:
- List items are ordered.
- A list allows duplicate list items.
- We can easily add or remove list items to the list after it has been created.
- The order of items is not changed when we add new items as they are placed at the end of the list.
- List items are indexed; that is, the first item has an index of
[0], the second one[1]etc. - List items can be of any data type.
We can find the length or the number of items in a list using the len() method.
sample_list1 = ['Bungalow', 'Cottage', 'Cabin', 1997, 2000]
len(sample_list1) # has 5 items
Accessing list items
Since list items are indexed, we can access them using their index number. The code below accesses the third element in the sample_list1 list above.
print(sample_list1[2]) # remember the indexes start at [0]
Let's also access the second element in sample_list2 list above.
print(sample_list2[1]) # access the second element
It is also possible to return a list of items from a certain range of indexes also called slicing. To do this, we require a start and end index.
For example, let's return items from the index [1] to the index [3] that is, from the second item to the fourth one.
print(sample_list1[1:3]) # start and end index
Observe that the item at the index [3] (1997) is not included in the new list.
If we don't specify the end index, the items will be returned from the start index to the end. If we leave the start index, the items will be returned from the first item in the list to the end index specified.
print(sample_list1[1:]) # ommit the end index
print(sample_list1[:3]) # ommit the start index
Negative indexing
A negative index accesses items from the end of the list. list[-1] returns the last item, list[-2] returns the second item from the end, and so on.
print(sample_list1[-2]) # returns 1997-second last item
We can also return a range of indexes from negative indexes.
# Negative slicing.
# return item from [-5] from end to item at [-2]-not included, from end

print(sample_list1[-5:-2])
Updating and removing list elements
We can change, add, or remove a value from a list.
Change list items
It is possible to update elements inside a list. Updating follows the syntax list[element_index] = new_value. Let's update the item at the index [3] (1997) in the sample_list1 list to 1996.
# changing the value of item at index [3]

sample_list1[3] = 1996
print(sample_list1)
Adding list item
To add elements to a list we use the append() method. The item is inserted at the end of the list.
We can add another type of home to the sample_list1 list called Charlet.
sample_list1.append('Charlet')
Removing list items and clearing a list
To remove a specific element from the list, we use the remove() method.
# Remove Charlet from the list

sample_list1.remove('Charlet')
print(sample_list1)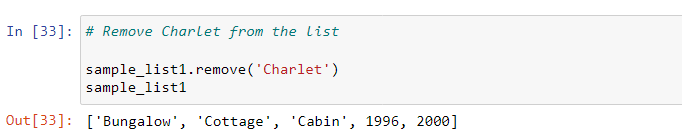
To remove a specific index, we use the pop() method or the del statement.
Using pop():
# Remove item at index 3 1996

sample_list1.pop(3)
print(sample_list1)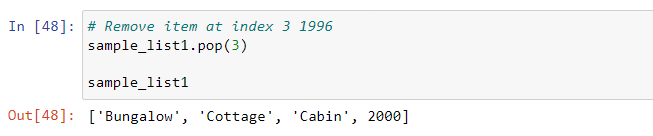
The last item is removed if you do not specify an index in the pop() method. Checking the current state of our list now, we have 2000 as the last item
# 2000 is removed

sample_list1.pop()
print(sample_list1)
Using del statement:
# Remove element with the del statement

sample_list2 = [30, 40, 100, 60]
del sample_list2[2] # Removes element at position 3 -> 100
print(sample_list2)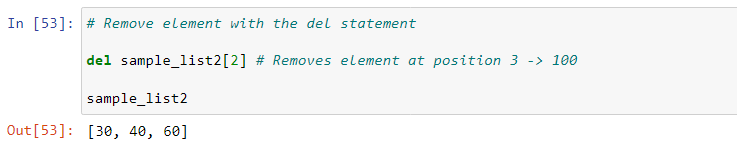
The del statement can also be used to delete the entire list from its existence. Hre's how we would delete the entire sample_list2 list.
del sample_list2If, in any case, you decide to clear a list, Python has a method called clear(). This method, when used, completely empties the entire list. The value of the list then evaluates to False as it is empty [].
Let's clear our sample_list1 list:
# clear method empties the list. bool(sample_list1) returns False

sample_list1.clear()
print(sample_list1)
Sorting lists
Python lists can be sorted. Python provides a sort() method to sort lists. The method, by default, sorts elements in ascending order.
Let's create new lists to work with:
# Create new lists

pizza_flavors = ['Pepperoni', 'Hawaiian ', 'Chicken Alfredo', 'Vegetarian ', 'Margherita']
pizza_prices_usd = [11.99, 17.99, 14.99, 18.99, 19.99]
Applying the sort() method:
pizza_flavors.sort()
print(pizza_flavors)
pizza_prices_usd.sort()
print(pizza_prices_usd)
To sort in descending order, we need to reverse the default behavior of the sort() method using the reverse = True argument.
# sort the pizza_flavors list in descending order

pizza_flavors.sort(reverse=True)

print(pizza_flavors)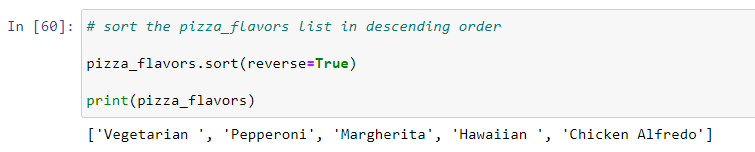
# sort pizza_prices_usd list in descending order

pizza_prices_usd.sort(reverse=True)

print(pizza_prices_usd)
If you are only interested in reversing the order of the list elements, that is, the element at the first index to shift to the last index and the element at the last index to the first index, and so on, you can use the reverse() method.
# reverse the order of list
pizza_flavors = ['Pepperoni', 'Hawaiian ', 'Chicken Alfredo', 'Vegetarian ', 'Margherita']
pizza_flavors.reverse()
pizza_flavors
Python tuples
A tuple is a type of Python's sequence data structure and is created by enclosing comma-separated items inside parenthesis (). A tuple is different from a list in that:
- A tuple is immutable, meaning you can't add or remove an item from it.
- A tuple is created with parenthesis.
- A tuple can be packed (assign values to a tuple) and unpacked (extract values into individual variables).
Example:
# creating tuple

sample_tuple1 = ('Pepperoni', 'Hawaiian ', 'Chicken Alfredo', 'Vegetarian ', 'Margherita')
print(sample_tuple1)

type(sample_tuple1)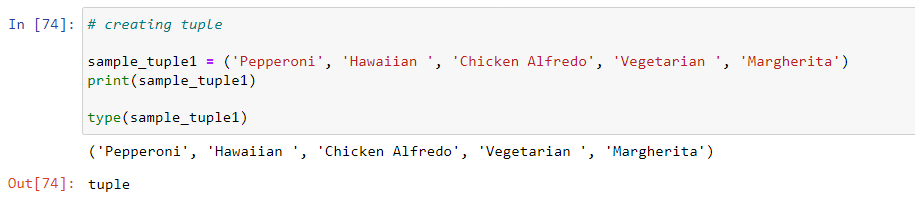
Accessing tuple items
Like lists, tuples also use zero-based indexing. So we can access items in the tuple with the index operator [].
# access the third element in the tuple

print(sample_tuple1[2])
Negative indexing
We can access elements from the end of the tuple where the last item is at -1 index. Let's access the second last element in the tuple at index [-2]:
# access the second last index

sample_tuple1[-2]
We specify the start and end index to slice a tuple.
sample_tuple1[1:4] # the element at fourth index is excluded
Updating tuples
Although tuples can not be modified once they are created, it is possible to do so by first converting the tuple into a mutable list and then converting it back to a tuple.
The example below changes the item at index [3] - 'Vegetarian' to 'Ranch':
# Updating a tuple

list_from_tuple = list(sample_tuple1) # convert the tuple to list

list_from_tuple[3] = 'Ranch' # change the item at index [3]

sample_tuple1 = tuple(list_from_tuple) # convert list back to tuple

sample_tuple1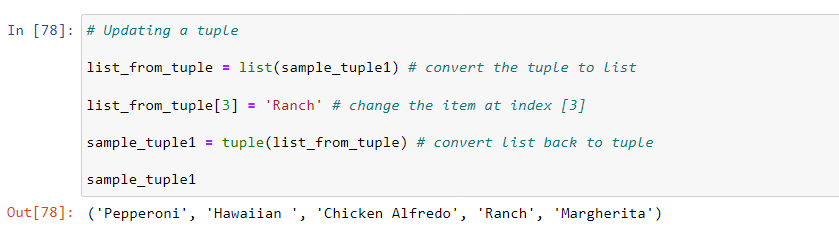
The above approach can be used to delete or remove items from the tuple with the list's methods (del and remove()).
Unpacking tuples
We can unpack a tuple after "packing" it. To unpack a tuple simply means that we can extract each item in the tuple to a variable. Let's look at an example:
# unpack the tuple

sample_tuple1 = ('Pepperoni', 'Hawaiian ', 'Chicken Alfredo', 'Vegetarian ', 'Margherita')

(house_type1, house_type2, house_type3, house_type4, house_type5) = sample_tuple1
print(house_type1)
print(house_type2)
print(house_type3)
print(house_type4)
print(house_type5)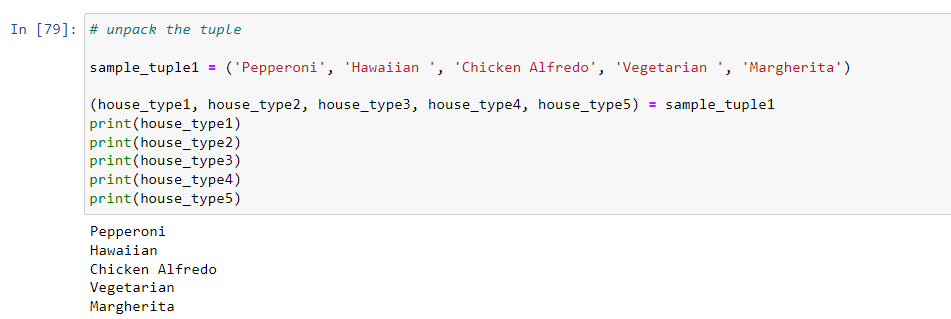
You must specify the same number of variables as the number of values in the tuple, or else an error will be thrown. However, if you need to extract a few of the values, you can prefix a variable that will unpack the rest of the values into a list with an asterisk *. See the example below.
# unpack rest of values in the tuple

sample_tuple1 = ('Pepperoni', 'Hawaiian ', 'Chicken Alfredo', 'Vegetarian ', 'Margherita')

(house_type1, house_type2, *other_house_types) = sample_tuple1
print(house_type1)
print(house_type2)
print(other_house_types)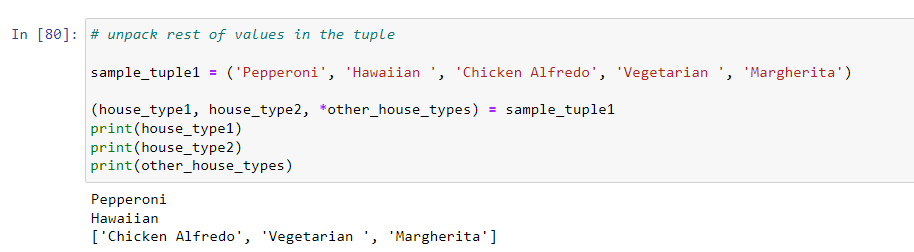
Python sets
A set is a type of Python's sequence data structure and is created with curly brackets {}. Some features of a set include:
- A set is immutable, but we can add or remove items.
- It is unordered and unindexed, meaning we can not access an item from it with an index.
- A set does not support duplicates; thus, each item must be unique.
- It can include different data types.
Example:
sample_set1 = {'Pensies', 'Sunflower', 'Pimrose', 'Marigolds', 'Baneberry'} # types of flowers set

print(type(sample_set1))
If we include duplicates in the set, they will be ignored:
sample_set1 = {'Pensies', 'Sunflower','Sunflower', 'Pimrose','Primrose', 'Marigolds', 'Baneberry'}
print(sample_set1)
# duplicates are ignored in the set
Accessing set items
Since sets are unindexed, it is impossible to access items from them with an index. However, we can use a for loop to iterate through the items and display them or check whether an item exists in the set.
# iterete over the set and display items
for flower in sample_set1:
  print(flower)

# check if an items exists in the set
print('sunflower' in sample_set1)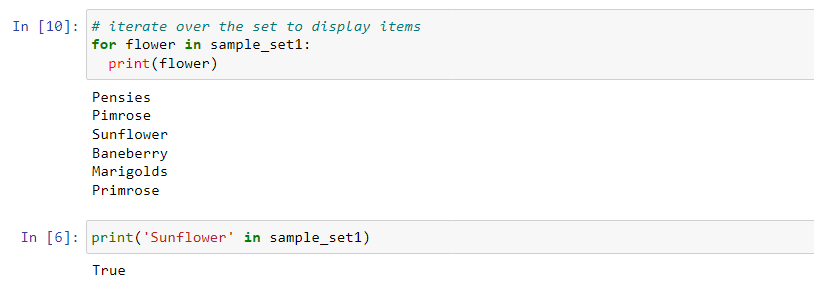
Adding items to a set
Although we can not change the items in a set once it has been created, Python provides methods for adding items. These methods are:
add()– adds a single element to the set.update()– adds multiple elements to the set. These multiple elements can be Python sequences, e.g., lists, tuples, dictionaries, etc.
Using add() method:
# adding a single element in the set

sample_set1.add('Bloodroot')
sample_set1.add('Buttercup')

print('Updated set with add() method')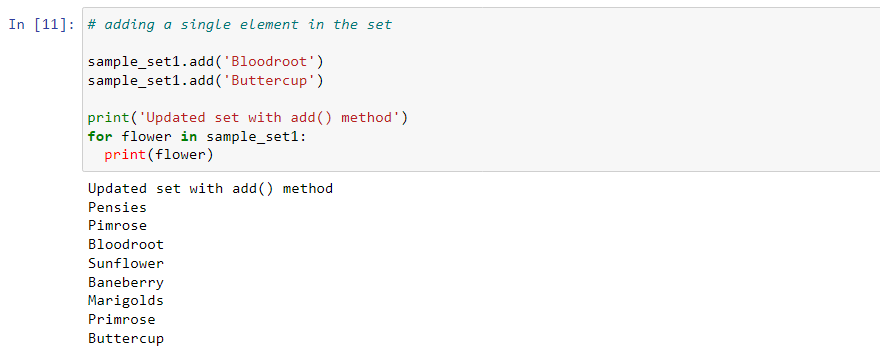
Using update() method:
sample_set1 = {'Pensies', 'Sunflower', 'Pimrose', 'Marigolds', 'Baneberry'}
sample_set1.update(['Bloodroot', 'Buttercup']) # add a list
print('Updated set with update() method')
sample_set1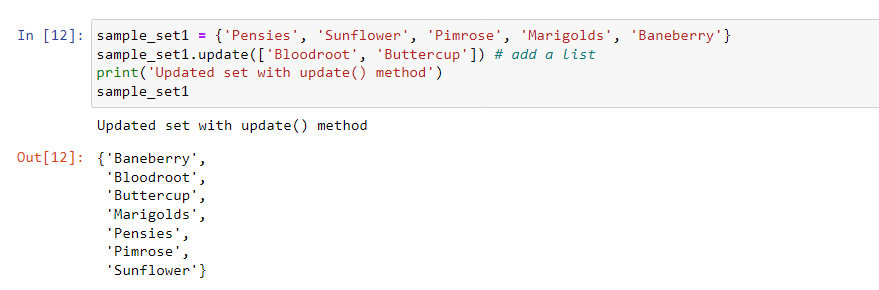
Removing items from a set
We can remove an item from a set with remove() and discard() methods.
sample_set1 = {'Pensies', 'Sunflower', 'Pimrose', 'Marigolds', 'Baneberry'}

sample_set1.remove('Marigolds') # removes Marigolds
sample_set1.discard('Sunflower') # discards Sunflower
print('Two flowers removed from the set')
print(sample_set1)
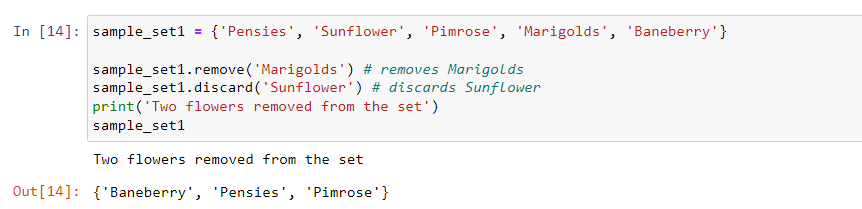
Although the remove() and the discard() methods seem to function similarly, the two have a slight difference, and that is if you remove() an item that does not exist in the set, an error will be raised, while if you discard() an item that does not exist, no error will be raised.
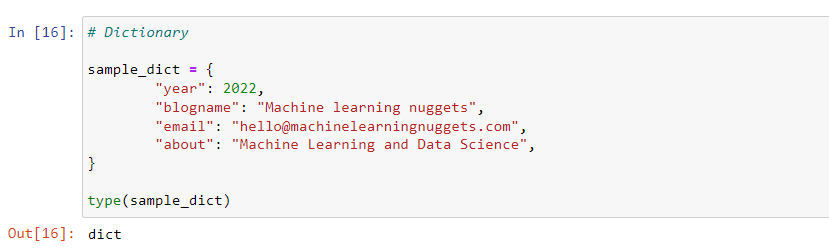
Python dictionaries
Dictionaries are a type of Python's sequence data structure that store data in key value pairs.
Some features of a dictionary include:
- It is created with curly
{}brackets. - It is ordered.
- A dictionary can not include duplicates.
- We can modify it, that is, change, remove or add items.
- The key can only be a single element, while the value can be of any type.
Example:
# dictionary
sample_dict = {
        "year": 2022,
        "blogname": "Machine learning nuggets",
        "email": "[email protected]",
        "about": "Machine Learning and Data Science",
}
print(type(sample_dict)
A dictionary can contain items of any data type, including Python sequences:
# Has a list data type

sample_dict = {
        "year": 2022,
        "blogname": "Machine learning nuggets",
        "email": "[email protected]",
        "about": "Machine Learning and Data Science",
        'featured': ['Python for data science', 'Numpy tutorial', 'Pandas tutorial']
}
print(sample_dict)
Accessing dictionary items
We can access dictionary items using keys as they are unique for each value. We pass the key inside square brackets to access a value like dict[key_name]. It is also important to know that when you use a key that does not exist, you will always get an error.
Let's access the name of the blog and its featured blogs in our sample_dict.
blog_name = sample_dict['blogname']
featured_blogs = sample_dict['featured'] # the value is a list loop to display indivudual items

print('Blog name: ', blog_name)
print('Featured: ', featured_blogs) 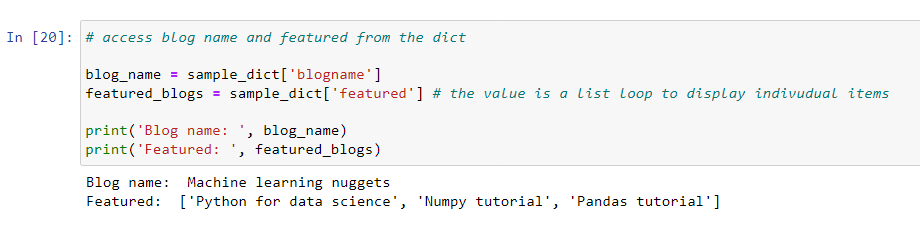
We can also display all the keys and values in the dictionary. The keys() method returns a list of all the keys and the values() method returns all the values.
# Display all keys and values

print(sample_dict.keys()) # displays a list of all keys
print(sample_dict.values()) # displays a list of all values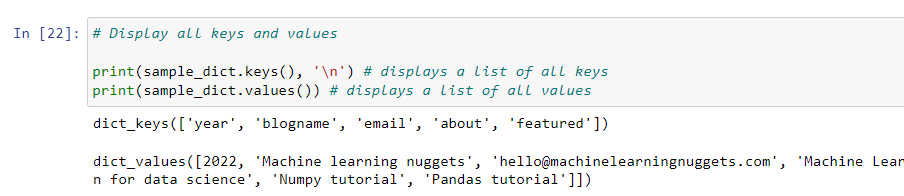
Updating a dictionary
We can update the dictionary by either adding new items or modifying the existing items following the syntax dict[key_name] = value.
Example:
We can update the featured blogs in our sample_dict:
# since the item with key_name=featured is a list we access and
# change the item at index 2
sample_dict["featured"][2] = 'How to build CNN in TensorFlow'
print('Featured: ',sample_dict)
Let's also add the number of posts to the dictionary:
# Add new item to the dict
sample_dict['posts'] = 30 # add item
print(sample_dict['posts']) # display item
Removing items from a dictionary
Like in lists, we can use the del keyword, clear(), and pop() methods to remove items from the dictionary.
# Remove year with pop() method
sample_dict.pop("year")

# Remove email with del keyword
del sample_dict["email"]

# Empty the entire dict with clear() method
sample_dict.clear()
Python decision-making statements
Decision-making statements allow us to execute a particular function or block of code depending on a set condition. These statements in Python include:
ifstatement.if-elsestatement.elifstatement.- nested
if elsestatements.
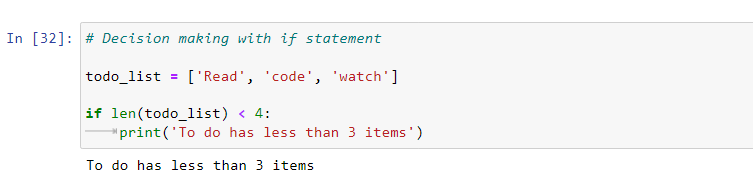
if statement
The if statement is the most basic decision-making statement. It has a condition and block of code to execute. If the condition is True, then the block of code is executed. Otherwise, the block of code is not executed.
if <condition>:
	<block of code>
The condition can be any valid logical expression that evaluates to either True or False.
Example:
todo_list = ['Read', 'code', 'watch']

# if lenght of list is less than 4...
if len(todo_list) < 4:
	print('To do has less than 3 items')
if-else statement
The if-else statement is just an extension of the if statement with an else block. It follows the syntax below:
if <condition>:
	<execute this block of code>
else:
	<execute this other block of code>
Example:
todo_list = ['Read', 'code', 'watch', 'Game']

if len(todo_list) < 4:
	print('To do has less than 3 items') # when condition is True
else:
	print('To do has more than 4 items') # when condition is False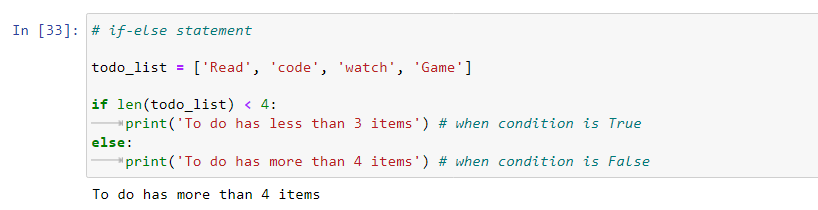
elif statement
This statement is an addition to the if-else block with an elif block that allows us to check for multiple conditions and execute the block of code on which the condition is True.
if <condition 1>:
	<block of code>
elif <condition 2>:
	<block of code>
elif <condition 3>:
	<block of code>
else:
	<execute this block if all the other conditions are False>
Example:
todo_list = ['Read', 'code', 'watch', 'Game']

if len(todo_list) > 4:
	print('To do has more 4 items')
elif len(todo_list) == 4:
	print('To do has 4 items')
elif len(todo_list) != 0:
	print('To do has less than 4 items')
else:
	print('To do has 0 items')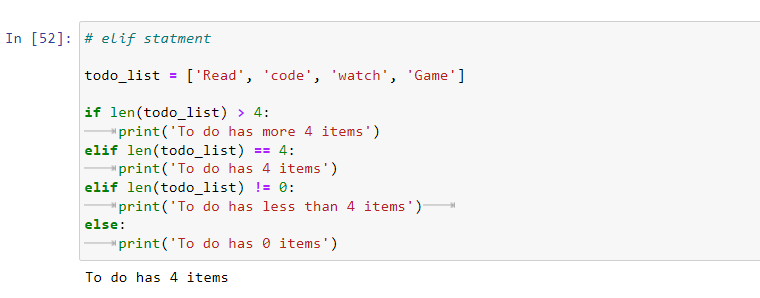
Nested if-else statements
In some situations, you may want to make a decision depending on the result of another decision. We can have an if-elif-else statement inside an if-else statement:
todo_list = ['Read', 'code', 'watch']

if len(todo_list) < 4:
    print('Todo has less than 4 items')
    if len(todo_list) == 0:
        print('Todo is empty')
    elif len(todo_list) == 1:
        print('Todo has 1 item')
    elif len(todo_list) == 2:
        print('Todo has 2 items')
    else:
        print('Todo has 3 items')
else:
    print('Todo has more than 4 items')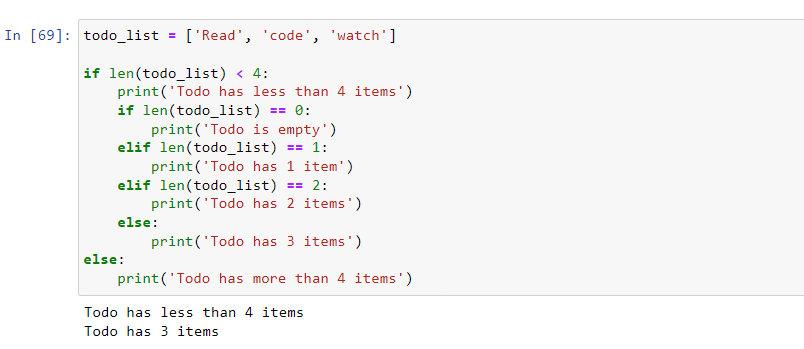
We have a shorthand syntax in Python for writing if-else statements called the Ternary operator. It is a more readable syntax and is shorter. It looks like this:
<execute this expression> if <conditional> else <execute this other expression>print('Todo has more than 4 items') if len(todo_list) > 4 else print('To do has less than 4 items')
Python loops
A loop enables us to execute a block of code multiple times. In Python, we have two loops:
- The
for loopthat executes a block of code repeatedly for each item in a Python sequence(lists, tuples, etc.). - The
while loopthat executes a block of code repeatedly while a given condition is True.
For loops
A for loop has the following syntax:
for value in sequence:
	<block of code>
Explaining the syntax:
Before the loop starts, the sequence is evaluated, the first item in the sequence is assigned to the value, and the code block is executed. Each item will be assigned to the value before the next loop begins, and the code block will be executed in each iteration loop.
Example:
flower_types = ['Pensies', 'Sunflower', 'Pimrose', 'Marigolds', 'Baneberry']
for value in flower_types:
	print(value)

# for each loop the item in the list is assigned
# to the value and then printed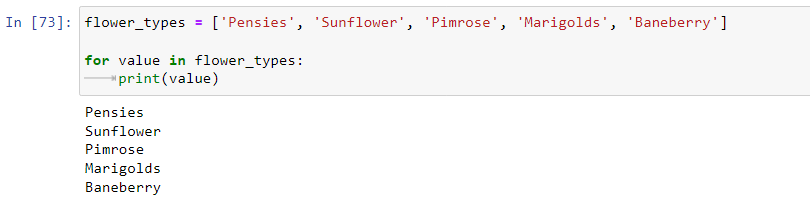
The range function()
The range(n) function offers an alternative way for looping a specified number of times n. The function produces a series of values from 0 to a number n-1. For example, range(5) produces values from 0 to 4. n must always be an integer.
for number in range(5):
	print(number)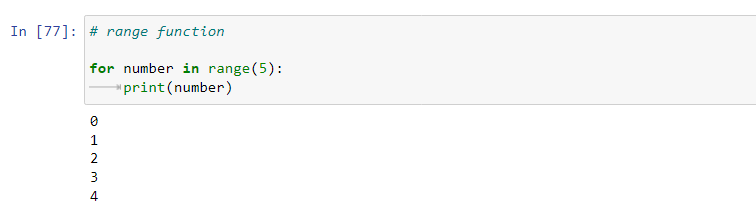
With the range() function, we can specify the start, stop and step size like range(start, stop, step).
# start = start number rather than the default 0
# stop = number where the iteration will stop
# step = the interval of iteration

for number in range(10, 20, 2):
	print(number)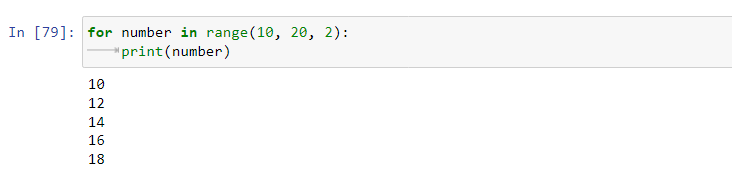
Lopping through a list with the range() function:
for flower in range(len(flower_types)):
# use len() to get the length of list
	print(flower)
Nested for loops
A nested for loop is a loop inside another for loop. The syntax is:
for value in sequence:
for value in sequence:
<block of code for inner loop>
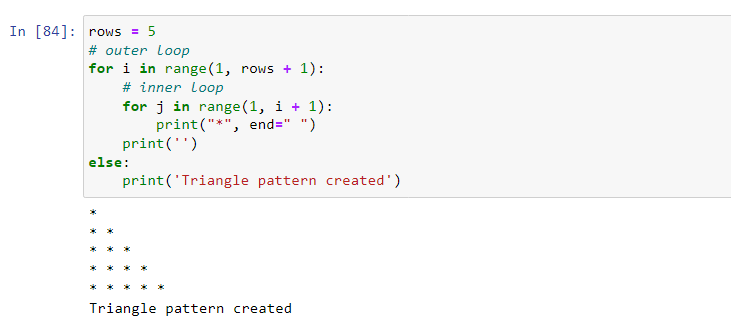
<block of code for outer loop> Example:
rows = 5
# outer loop
for i in range(1, rows + 1):
    # inner loop
    for j in range(1, i + 1):
        print("*", end=" ")
    print('')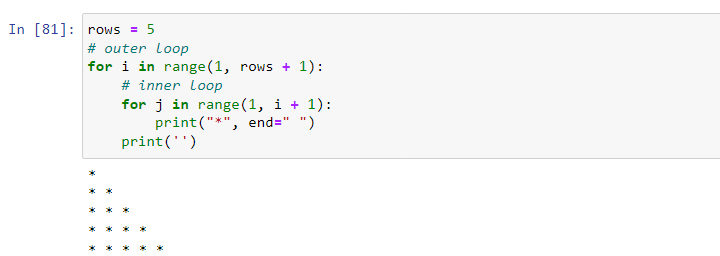
A for loop can include an else block that is executed once the iteration is complete. Let's look at an example.
While loops
A while loop iterates a specified number of times as long as the condition is True. The block of code after the loop will be executed once the condition is False.
Syntax:
while <condition>:
	<block of code>
Example: Print the sentence 'Learning Python' 5 times.
counter = 0 #initialize loop counter
while counter < 5:
	counter = counter + 1 # increment count by 1 for each iteration
	print('Learning Python')
print('I am here since the condition is false!')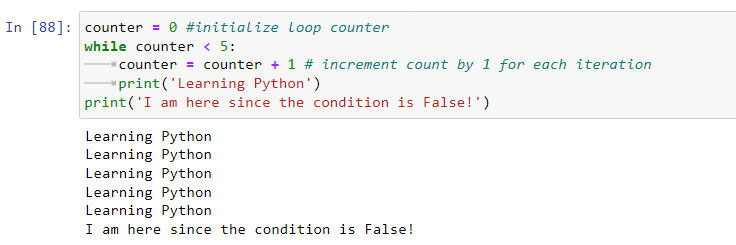
Loop control statements (break and continue)
We may want to alter the normal execution flow of a loop based on certain conditions. This may stop execution completely when a condition is met or skip a specific part in the loop. Python provides a break and continue statement for this.
The break statement
The break statement stops a loop before it loops through all the items.
break statement inside a for loop:
flower_types = ['Pensies', 'Sunflower', 'Pimrose', 'Marigolds', 'Baneberry']
for value in flower_types:
  if value == 'Pimrose':
    # check if current value is 'Primrose' if True stop looping
    break
  print(value)

  # If you want 'Primrose' displayed,
  # specify the print(value) before the if condition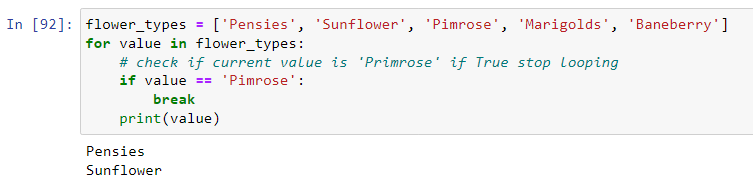
break statement in while loop:
counter = 0 #initialize loop counter
while counter < 5:
  counter = counter + 1
  if counter == 3:
    break
  print('Learning Python')
print('I am here since the condition is false!')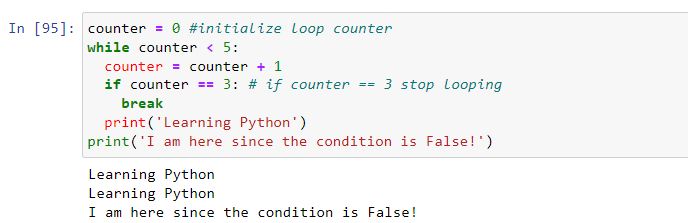
The continue statement
This statement skips the current iteration and moves to the next.
Example in a for loop:
flower_types = ['Pensies', 'Sunflower', 'Pimrose', 'Marigolds', 'Baneberry']
for value in flower_types:
  # check if current value is 'Primrose' if True skip it got to next item
  if value == 'Pimrose':
      continue
  print(value)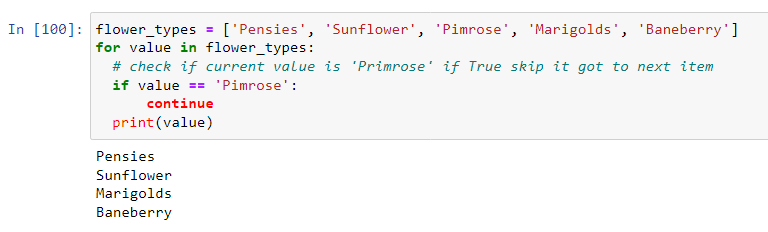
Python functions
A function is a reusable block of code designed to perform a single task and only runs when it is invoked or called.
Functions are beneficial in that:
- They enable code re-use for a specified action rather than rewriting the same code every time we need it.
- We can break down a large program into functions that can be easier to track and maintain.
- A function can be called from anywhere in the program and can be called with different arguments to return the needed results.
A function is defined with the def keyword. It follows the syntax:
def function_name (parameters):
	<function body
    {statements}>
return value
The return exits the function. If it has no value it means return nothing.
Example:
def area():
  area_rect = 10 * 5
  print('Area of rectangle = ', area_rect)
  return
Calling a function:
When you define a function, you only give it a basic structure which includes:
- The name of the function.
- The parameters the function will take.
- The structure of the block of code.
After defining the structure, the function is useless until you call it. We can call the function from anywhere in our code. We call the function with its name and parenthesis - function_name().
def area():
  area_rect = 10 * 5
  print('Area of rectangle = ', area_rect)
  return
  area()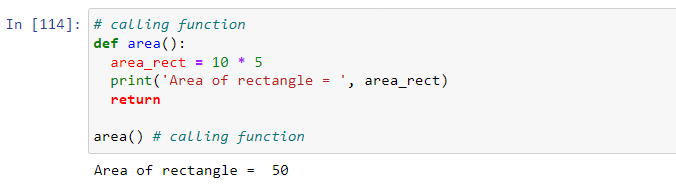
Function parameters and arguments
We can pass values inside the function parenthesis.
Parameters are values passed in the parenthesis of a function during its definition.
Arguments are the values passed in the parenthesis of the function when calling it. The arguments assign values to the parameters.
Example:
# create a function area() and pass three parameters shape, length and breath

def area(shape, length, breath):
  area = length * breath
  print(shape, 'area = ', area)
  return

# calling syntax
area(<value of param1>, <val of param2>, <val of param3>) 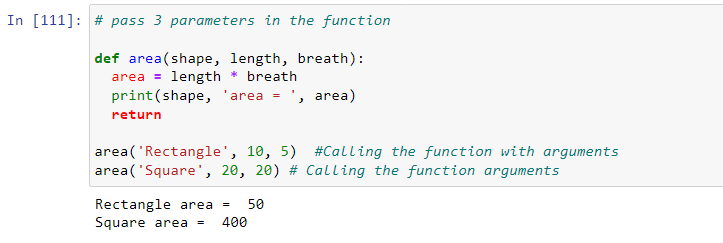
You can pass in any number of parameters in the function. However, the number of arguments passed when calling the function must equal the number of parameters passed. This is the default, but there is a workaround with *args and *kwargs arguments.
Python *args and **kwargs
Sometimes we may define a function, but we are unsure how many arguments it will contain. In some cases, we could create a list of the arguments we think will be passed in the function and pass the list as the function's argument. But this can be inconvenient such that for every instance we call the function, we will have to create a list of the arguments.
To solve this, Python provides variable-length arguments the *args and **kwargs. So we can use them whenever we are unsure of the number of arguments.
Using *args:
These are non-keyword arguments and are specified by the single *. For example, suppose you want to sum a varying number of values.
def total_sales(*args):
    total = 0
    for sale in args:
        total = total + sale
    return total
print('Total sales:', total_sales(4000, 10000, 5000, 15000, 2000))
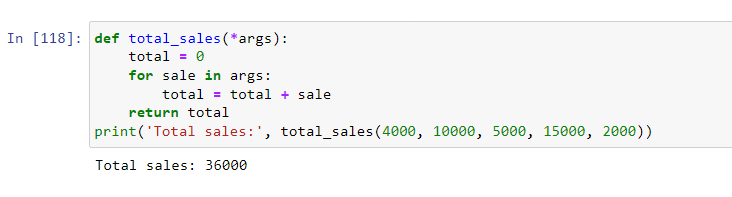
The iterable you get by using the args argument is a tuple which means that it is immutable.
Using **kwargs:
These are keyword arguments that are specified with double **. It is similar to args but uses named arguments, also called keywords. For example, you can specify each sale_amount to what item was sold.
# *kwargs

def total_sales(**kwargs):
    items = ""
    total = 0
    # Display items sold (keys)
    for item in kwargs.keys():
        items = items + item
    print('Items Sold:', items)

    # Display total sales
    for sale in kwargs.values():
        total = total + sale
    return total
print('Total sales:', total_sales(Tv_set = 4000, Dining_table = 10000, Fridge = 5000, Carpet = 15000))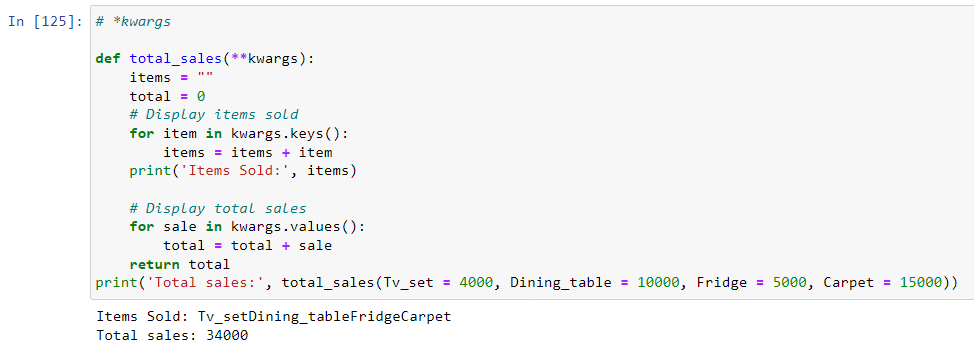
The iterable you get by using the kwargs argument is a dictionary, meaning it is mutable.
Python lambda functions (anonymous functions)
Lambda functions are not defined with the def keyword and have no name. They are defined using the lambda function. They have the following syntax:
lambda args:expressionThe args represent arguments. The function can have as many arguments as you want, but only one expression is evaluated and returned.
Example:
square = lambda num:num * num
print(square(10))

# 100
Example with a map() function that takes in a function and an iterable(e.g., list):
Let's square all the values in the list:
examp_list = [10, 5, 15, 6]
squares = list(map(lambda num: num*num, examp_list)) # convert the results to a list with list()
print(squares)
Python map function
The map() function transforms all the items in an iterable without explicitly using the for loop. We primarily use it when we want to apply a transformation function to each element and convert them into a new iterable.
The map() function has the following syntax:
map(function, iterable_1, iterable_2,...iterable_N)map() takes in a transformation function as its first argument, transforming each item in the iterable into a new item.
For example, let's reverse each word in a list:
# first define the transformation function
def reverse(str):
    string = " "
    for i in str:
        string = i + string
    return string

# the list of words
words = ['Data science', 'Nuggets', 'Python', 'Learn']

# Apply the map() function
reversed_words = map(reverse, words) # returns the map object

print(reversed_words)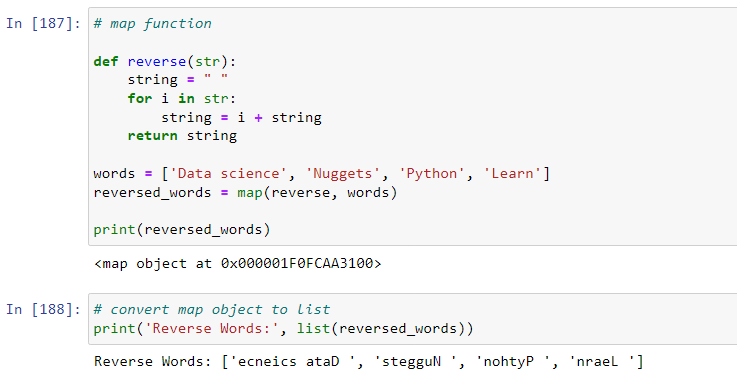
map()'s transformation function can be any function, e.g the lambda() function(example), pow(), abs(), len(), float(), int(), string functions like str.lower(), and str.upper() .
Python datetime
A datetime is a date plus time. Python has a module named datetime which we can import as it provides classes to work with dates and time.
We can display the current date:
import datatime

today = datetime.datetime.now()
print(today)

# 2022-08-09 21:14:41.104532
The date contains the year, month, day, hour, minute, second, and microsecond. Python has a method called strftime() that we can use to convert dates into a readable format. Example:
today = datetime.datetime.now()
print(today.strftime("%B")) # Gives the month full name
# August
Some strftime() format codes may include:
- %Y – returns year full form,e.g., 2022.
- %B – returns month full form,e.g., August.
- %b – returns month short form,e.g., Aug.
- %d – returns the day of the month,e,g 20.
- %A – returns weekday in full,e.g, Tuesday.
We can create a date with the datetime() constructor. It takes in the year, month and day. Example:
today = datetime.datetime(2022, 8, 9) # year, month, day
print('Year: ', today.strftime('%Y'))
print('Month: ', today.strftime('%B'))
print('Day: ', today.strftime('%A'))
'''
Year:  2022
Month:  August
Day:  Tuesday

'''
Python try - except (Exception handling)
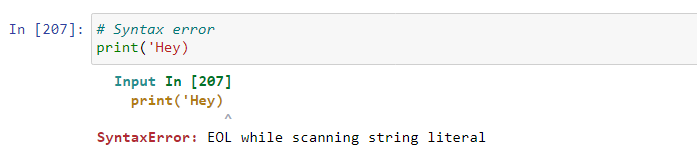
Sometimes a Python program can stop the execution of the rest of the program due to an unexpected error. The error can be a syntax error or a Python exception.
A Python exception is an event that disrupts a program's expected normal flow and represents the error. It is the error raised by a syntactically correct program.
Example of a syntax and exception error:
Syntax Error:
Exception error:
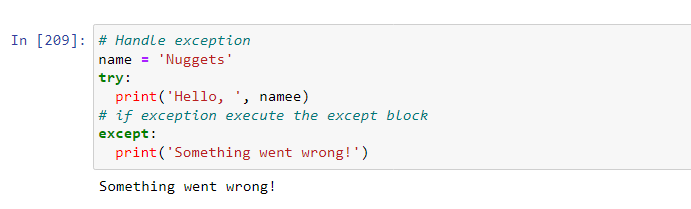
Catching exceptions
Python has a try and except code block that enables us to handle exceptions that arise. It has the following syntax:
try:
	<block of code>
except:
	<If exception, execute this block of code>
Example:
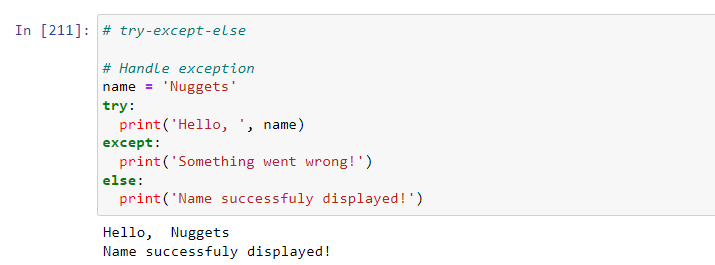
The try-except-else blocks
We also have an else block that is executed if no error occurs. Syntax:
try:
	<block of code of code>
except:
	<If exception execute this block of code>
else:
	<if no exception also execute this block of code>
Example:
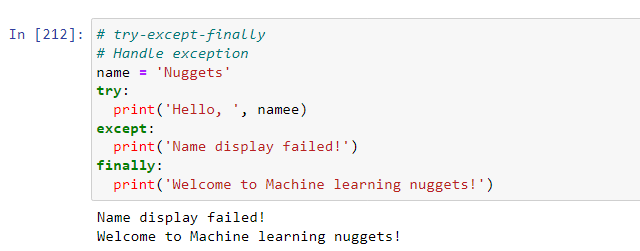
The try-except-finally blocks
The finally block executes whether the program raises an exception or not. This block can not be used if there is an else block. Its syntax is:
try:
	<block of code of code>
except:
	<If exception execute this block of code>
finally:
	<must always execute this block of code>
Example:
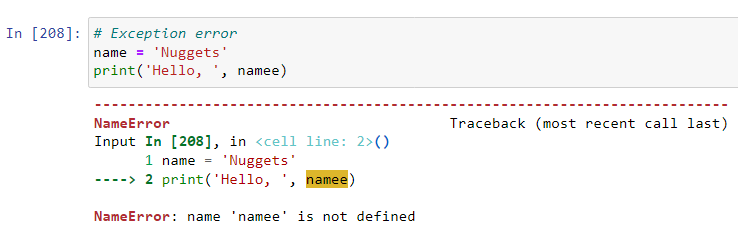
The except block with exception name
Specifying the name of the exception you are trying to catch is a good practice. This is because an except block without an exception name catches all the exceptions, making it challenging to find the exact error in the program.
For example, we can try to catch an error if a variable we are using can not be found:
# except with Exception name

# Handle exception
name = 'Nuggets'
try:
  print('Hello, ', namee)
except NameError :
  print('Variable is not defined!')
finally:
print('Welcome to Machine learning nuggets!') 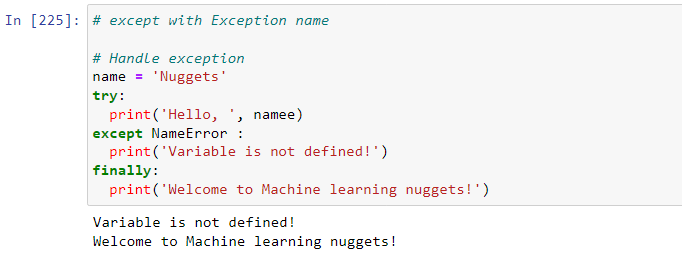
There are other exceptions like:
- KeyError – Raised when a key can not be found in a dictionary
- SyntaxError – Raised by a wrong Python syntax
- IndentationError – Raised by an improper indentation
You can find other exceptions on Python docs.

Data science packages for Python
Now that you have learned the basic Python for data science concepts, it is time to introduce you to some data science packages.
- NumPy stands for Numerical Python. It has multidimensional array objects and algorithms for manipulating those arrays. Find more in our NumPy tutorial.
- Pandas is a library that provides a rich collection of data analysis tools for working with datasets. Find more in our Pandas tutorial.
- Matplotlib is the most well-known package for data visualizations and plotting.
- Streamlit is an open-source Python framework for developing web apps for machine learning and data science problems. Find more on our Streamlit tutorial.
- Keras and Tensorflow – Keras is a Python package for developing and evaluating deep learning models and runs on the TensorFlow framework. TensorFlow is an end-to-end platform for creating Machine Learning applications. Find more on How to build artificial neural networks with Keras and TensorFlow.
- Seaborn is statistical Python data visualization library built on the Matplotlib library. It offers a high-level interface to make statistical visualizations.
Python virtual environments
Many times, Python applications may require different versions of Python to run as they may require different dependencies. For instance, an application may need a dependency on older versions of Python that is not in on newer versions. This means that one Python installation may not apply to every application, which may bring conflicts.
To solve this, we create Python virtual environments that contain a Python version and the application packages using it. This way, Python applications can run in different virtual environments.
Let's discuss two ways of creating these virtual environments for package management.
- Using pip (venv for Python 3)
- Using the Conda command from Anaconda
Creating virtual environments and installing packages with pip
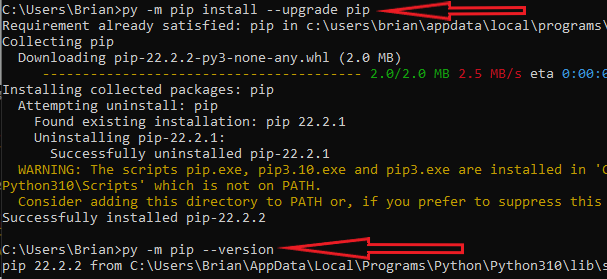
pip is used to install and update packages. Python installers will come with pip already installed.
To confirm that you have it installed, run py -m pip --version if the version is not up to date, runpy -m pip install --upgrade pip to update it.
Creating virtual environment
First, install virtualenv to manage Python packages for different projects. Run the following command:
py -m pip install --user virtualenv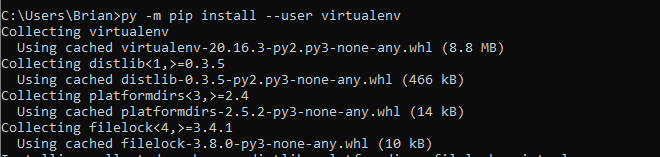
To create a virtual environment for your project, navigate to your project directory and run venv.
py -m venv env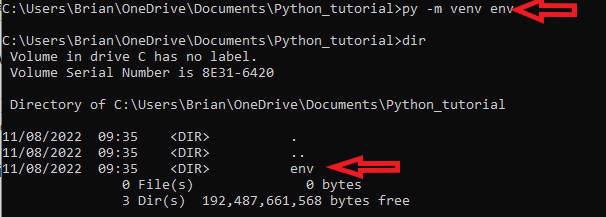
Theenv is the folder where the venv will create the virtual environment. Notice we used venv since we are using Python 3. If you have Python 2 replace it with virtualenv.
Before installing any packages, you need to activate the virtual environment.
.\env\Scripts\activate
On Linux and macOS activate the environment using:
source env/Scripts/bin/activate
Installing packages in the virtual environment
Now that you are in the virtual environment, you can run the command below to install any package:
py -m pip install package_name

To exit or deactivate the virtual environment typedeactivate command.
Creating virtual environments and installing packages with conda
Anaconda is a complete package management and deployment tool. It creates a virtual environment that makes it effortless to deploy any project. It has over 7,500 open source packages that can be installed in various ways.
Creating virtual environments on Conda (windows)
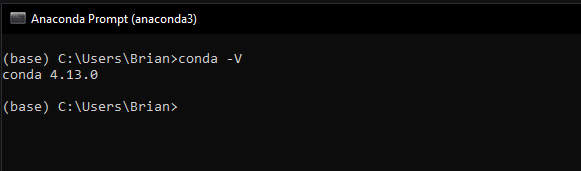
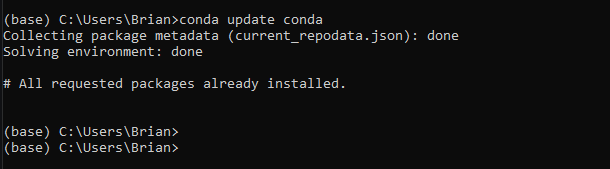
1. Navigate to the Anaconda prompt and type conda -V to confirm you have conda installed. You should see an output like the one below.
2. Update the conda environment with conda update conda.
To see the Python version available type conda search “^python$”.
4. Set up the virtual environment with conda create -n envname python=3.9 anaconda. Replace the envname with the name of the environment and 3.9 with the Python version you want.

5. Once the environment is created, you need to activate it so that all the packages you wish to use can be stored in this environment. Activate with conda activate envname.

6. Now, you can install any package you want with conda install -n yourenvname package_name.

7. You can delete the virtual environment with conda remove -n envname -all.
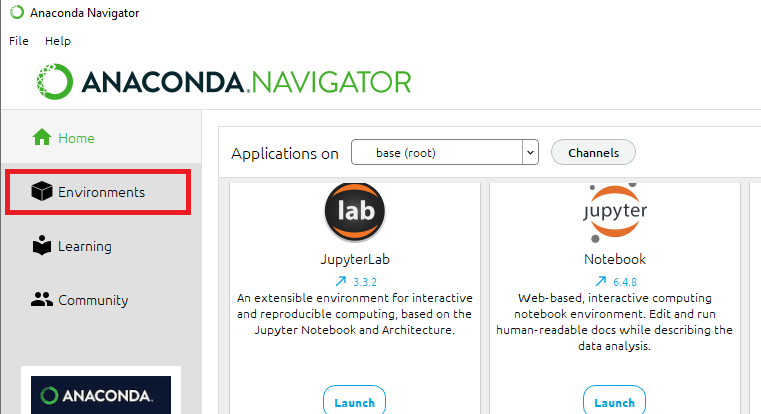
You can also install packages using the Anaconda Navigator.
Installing packages through Anaconda Navigator
Let's follow through by trying to install the streamlit package. You can follow this process on Linux, Windows, or macOS.
- Open the Anaconda Navigator and navigate to the 'Environments' menu – highlighted.
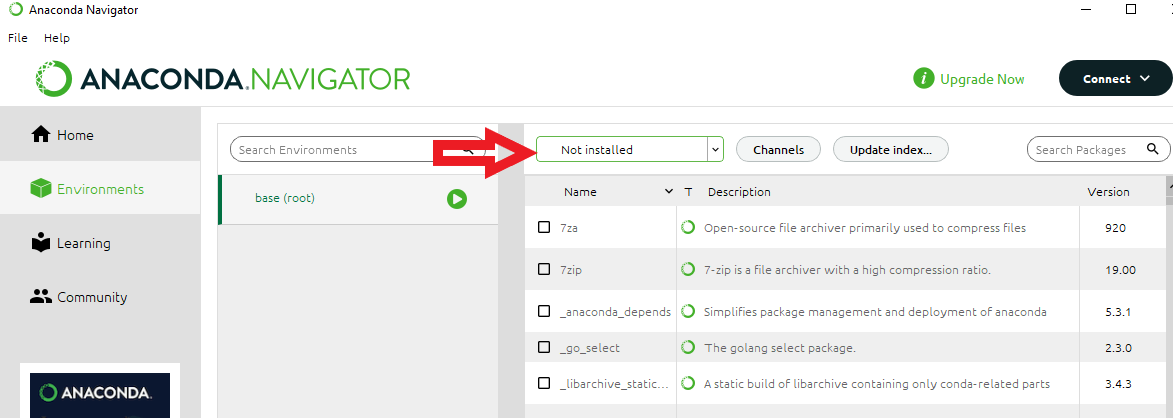
2. Once in the 'Environments' window, click the dropdown just before the 'channels' tab - pointed, and select 'Not installed.
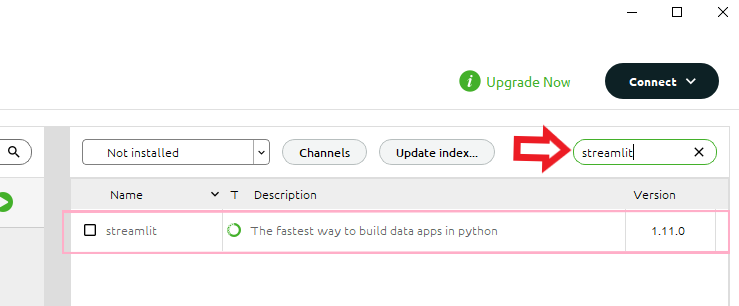
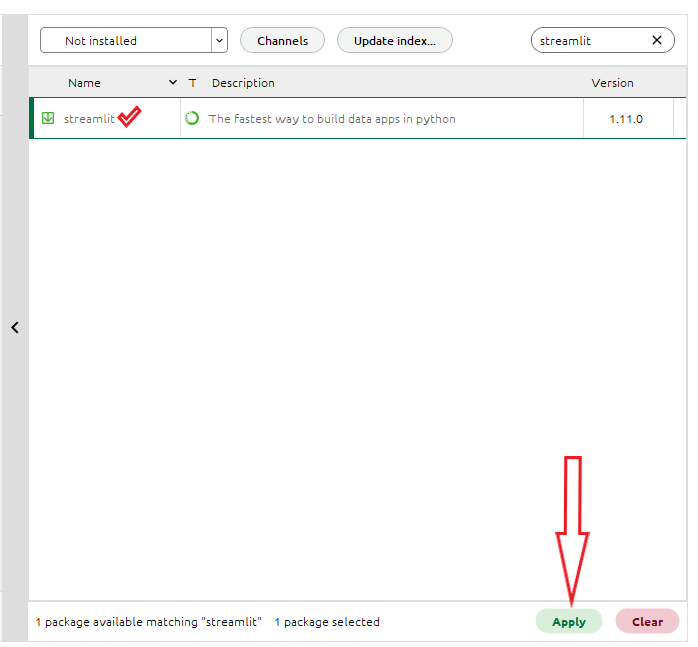
3. On the top right corner, there is a search bar – pointed below. Type the name of the package we want to install. If it is not installed, it will appear as shown below. In this case, search for streamlit.
4. Click on the checkbox on streamlit to select it. A prompt will appear at the bottom buttons Apply and Clear. Click on Apply.
5. On clicking on Apply, the installation will start. It might take some time to install, and once it's done, it's ready to work with it. You only need to import it into your program.
Final thoughts
In this article, we have talked about the fundamental concepts of Python that will get you started in your data science journey. The following are some of the concepts we have learned:
- Python lists
- Python tuples
- Python dictionaries
- Python loops
- Python decision-making statements
- Overview of data science packages
- Python virtual environments and managing packages.
...just to mention a few.
The Complete Data Science and Machine Learning Bootcamp on Udemy is a great next step if you want to keep exploring the data science and machine learning field.
Follow us on LinkedIn, Twitter, GitHub, and subscribe to our blog, so you don't miss a new issue.