
Transfer learning with JAX & Flax


Training large neural networks can take days or weeks. Once these networks are trained, you can take advantage of their weights and apply them to new tasks– transfer learning. As a result, you fine-tune a new network and get good results in a short period. Let's look at how you can fine-tune a pre-trained ResNet network in JAX and Flax.
Install JAX ResNet
We'll use ResNet checkpoints provided by the jax-resnet library.
pip install jax-resnetLet's import it together with other packages used in this article.
# pip install flax
import numpy as np
import pandas as pd
from PIL import Image
import jax
import optax
import flax
import jax.numpy as jnp
from jax_resnet import pretrained_resnet, slice_variables, Sequential
from flax.training import train_state
from flax import linen as nn
from flax.core import FrozenDict,frozen_dict
from functools import partial
import os
import torch
from torch.utils.data import DataLoader
from torchvision import transforms
from torch.utils.data import Dataset
import matplotlib.pyplot as plt
%matplotlib inline
# ignore harmless warnings
import warnings
warnings.filterwarnings("ignore")👉 Check our Transfer learning guide(With examples for text and images in Keras and PyTorch) tutorial.
Download dataset
We will fine-tune the ResNet model to predict two classes from the cats and dogs dataset. Download and extract the cat and dog images.
pip install wget
import wget
wget.download("https://ml.machinelearningnuggets.com/train.zip")
import zipfile
with zipfile.ZipFile('train.zip', 'r') as zip_ref:
  zip_ref.extractall('.')
Data loading in JAX
JAX doesn't ship with data loading utilities. We use existing data loaders in TensorFlow and PyTorch to load the data. Let's use PyTorch to load the image data.
The first step is to create a PyTorch Dataset class.
class CatsDogsDataset(Dataset):
    def __init__(self, root_dir, annotation_file, transform=None):
        self.root_dir = root_dir
        self.annotations = pd.read_csv(annotation_file)
        self.transform = transform

    def __len__(self):
        return len(self.annotations)

    def __getitem__(self, index):
        img_id = self.annotations.iloc[index, 0]
        img = Image.open(os.path.join(self.root_dir, img_id)).convert("RGB")
        y_label = torch.tensor(float(self.annotations.iloc[index, 1]))

        if self.transform is not None:
            img = self.transform(img)

return (img, y_label)Check our How to load datasets in JAX with TensorFlow tutorial.
Data processing
Next, create a Pandas DataFrame with the image paths and labels.
train_df = pd.DataFrame(columns=["img_path","label"])
train_df["img_path"] = os.listdir("train/")
for idx, i in enumerate(os.listdir("train/")):
    if "cat" in i:
        train_df["label"][idx] = 0
    if "dog" in i:
        train_df["label"][idx] = 1

train_df.to_csv (r'train_csv.csv', index = False, header=True)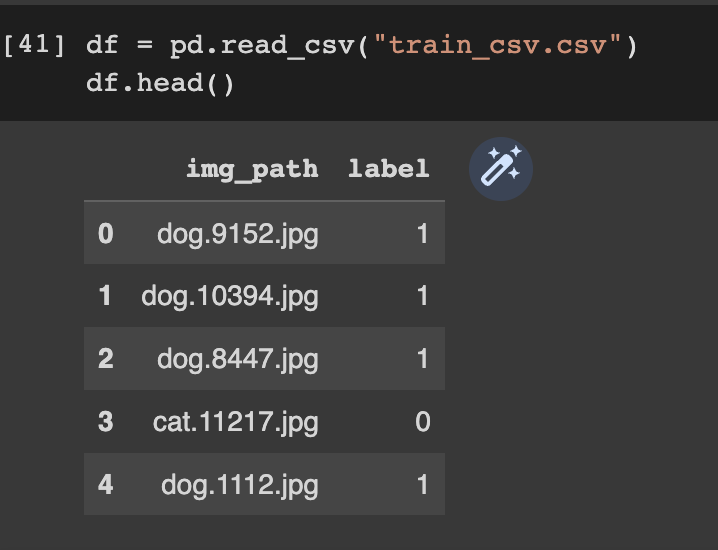
Define a function to stack the data and return the images and labels as a NumPy array.
def custom_collate_fn(batch):
    transposed_data = list(zip(*batch))
    labels = np.array(transposed_data[1])
    imgs = np.stack(transposed_data[0])
    return imgs, labels
Let's also resize the images to ensure they are the same size. Define the size in a configuration dictionary. We'll use the other config variables later.
config = {
    'NUM_LABELS': 2,
    'BATCH_SIZE': 32,
    'N_EPOCHS': 5,
    'LR': 0.001,
    'IMAGE_SIZE': 224,
    'WEIGHT_DECAY': 1e-5,
    'FREEZE_BACKBONE': True,
}
Resize the images using PyTorch transforms. Next, use the CatsDogsDataset class to define the training and testing data loaders.
transform = transforms.Compose([
    transforms.Resize((config["IMAGE_SIZE"],config["IMAGE_SIZE"])),
    np.array])
dataset = CatsDogsDataset("train","train_csv.csv",transform=transform)
train_set, validation_set = torch.utils.data.random_split(dataset,[20000,5000])
train_loader = DataLoader(dataset=train_set, collate_fn=custom_collate_fn,shuffle=True, batch_size=config["BATCH_SIZE"])
validation_loader = DataLoader(dataset=validation_set,collate_fn=custom_collate_fn, shuffle=False, batch_size=config["BATCH_SIZE"])
ResNet model definition
Pre-trained ResNet models are trained on many classes. However, the dataset we have has two classes. We, therefore, use the ResNet as the backbone and define a custom classification layer.
Create head network
Create a head network with output as per the problem, in this case, a binary image classification.
"""
reference - https://www.kaggle.com/code/alexlwh/happywhale-flax-jax-tpu-gpu-resnet-baseline
"""
class Head(nn.Module):
    '''head model'''
    batch_norm_cls: partial = partial(nn.BatchNorm, momentum=0.9)
    @nn.compact
    def __call__(self, inputs, train: bool):
        output_n = inputs.shape[-1]
        x = self.batch_norm_cls(use_running_average=not train)(inputs)
        x = nn.Dropout(rate=0.25)(x, deterministic=not train)
        x = nn.Dense(features=output_n)(x)
        x = nn.relu(x)
        x = self.batch_norm_cls(use_running_average=not train)(x)
        x = nn.Dropout(rate=0.5)(x, deterministic=not train)
        x = nn.Dense(features=config["NUM_LABELS"])(x)
        return x
Combine ResNet backbone with head
Combine the pre-trained ResNet backbone with the custom head you created above.
class Model(nn.Module):
    '''Combines backbone and head model'''
    backbone: Sequential
    head: Head

    def __call__(self, inputs, train: bool):
        x = self.backbone(inputs)
        # average pool layer
        x = jnp.mean(x, axis=(1, 2))
        x = self.head(x, train)
        return x
Load pre-trained ResNet 50
Next, create a function that loads the pre-trained ResNet model. Omit the last two layers of the network because we have defined a custom head. The function returns the ResNet model and its parameters. The model parameters are obtained using the slice_variables function.
def get_backbone_and_params(model_arch: str):
    '''
    Get backbone and params
    1. Loads pretrained model (resnet50)
    2. Get model and param structure except last 2 layers
    3. Extract the corresponding subset of the variables dict
    INPUT : model_arch
    RETURNS backbone , backbone_params
    '''
    if model_arch == 'resnet50':
        resnet_tmpl, params = pretrained_resnet(50)
        model = resnet_tmpl()
    else:
        raise NotImplementedError

    # get model & param structure for backbone
    start, end = 0, len(model.layers) - 2
    backbone = Sequential(model.layers[start:end])
    backbone_params = slice_variables(params, start, end)
    return backbone, backbone_params
Get model and variables
Use the above function to create the final model. Define a function that:
- Initializes the network's input.
- Obtains the ResNet backbone and its parameters.
- Passes the input to the backbone and gets the output.
- Initializes the network's head.
- Creates the final model using backbone and head.
- Combines the parameters from backbone and head.
def get_model_and_variables(model_arch: str, head_init_key: int):
    '''
    Get model and variables
    1. Initialise inputs(shape=(1,image_size,image_size,3))
    2. Get backbone and params
    3. Apply backbone model and get outputs
    4. Initialise head
    5. Create final model using backbone and head
    6. Combine params from backbone and head

    INPUT model_arch, head_init_key
    RETURNS  model, variables
    '''

    #backbone
    inputs = jnp.ones((1, config['IMAGE_SIZE'],config['IMAGE_SIZE'], 3), jnp.float32)
    backbone, backbone_params = get_backbone_and_params(model_arch)
    key = jax.random.PRNGKey(head_init_key)
    backbone_output = backbone.apply(backbone_params, inputs, mutable=False)

    #head
    head_inputs = jnp.ones((1, backbone_output.shape[-1]), jnp.float32)
    head = Head()
    head_params = head.init(key, head_inputs, train=False)

    #final model
    model = Model(backbone, head)
    variables = FrozenDict({
        'params': {
            'backbone': backbone_params['params'],
            'head': head_params['params']
        },
        'batch_stats': {
            'backbone': backbone_params['batch_stats'],
            'head': head_params['batch_stats']
        }
    })
    return model, variables
All names relating to the backbone network are prefixed with the name backbone. You can use any name, but all backbone variable names should be the same. This is important when freezing layers, as we'll see later.
Next, use the function defined above to create the model.
model, variables = get_model_and_variables('resnet50', 0)

Zero gradients
Since we are applying transfer learning, we need to ensure that the backbone is not updated. Otherwise, we'll be training the network from scratch. We want to take advantage of the pre-trained weights and use them as a feature extractor for the network. To achieve this, we freeze the parameters of all layers whose name starts with backbone. As a result, these parameters will not be updated during training.
"""
reference - https://github.com/deepmind/optax/issues/159#issuecomment-896459491
"""
def zero_grads():
    '''
    Zero out the previous gradient computation
    '''
    def init_fn(_):
        return ()
    def update_fn(updates, state, params=None):
        return jax.tree_map(jnp.zeros_like, updates), ()
    return optax.GradientTransformation(init_fn, update_fn)

 """
reference - https://colab.research.google.com/drive/1g_pt2Rc3bv6H6qchvGHD-BpgF-Pt4vrC#scrollTo=TqDvTL_tIQCH&line=2&uniqifier=1
"""
def create_mask(params, label_fn):
    def _map(params, mask, label_fn):
        for k in params:
            if label_fn(k):
                mask[k] = 'zero'
            else:
                if isinstance(params[k], FrozenDict):
                    mask[k] = {}
                    _map(params[k], mask[k], label_fn)
                else:
                    mask[k] = 'adam'
    mask = {}
    _map(params, mask, label_fn)
    return frozen_dict.freeze(mask)
Define Flax optimizer
Create an optimizer that will only be applied to the head and not backbone layers. This is done using the optax.multi_transform while passing the desired transformations.
adamw = optax.adamw(
    learning_rate=config['LR'],
    b1=0.9, b2=0.999,
    eps=1e-6, weight_decay=1e-2
)
optimizer = optax.multi_transform(
    {'adam': adamw, 'zero': zero_grads()},
    create_mask(variables['params'], lambda s: s.startswith('backbone'))
)Check our JAX and Flax optimizers tutorial.
Define Flax loss function
Next, define the function to compute the loss function.
def cross_entropy_loss(*, logits, labels):
  labels_onehot = jax.nn.one_hot(labels, num_classes=config["NUM_LABELS"])
  return optax.softmax_cross_entropy(logits=logits, labels=labels_onehot).mean()
When computing the loss during training, set train to True. You also have to:
- Set the
batch_stats - Define the random number for the
dropoutlayers. - Set the
batch_statsas mutable.
def compute_loss(params, batch_stats, images, labels):
    logits,batch_stats = model.apply({'params': params,'batch_stats': batch_stats},images, train=True,rngs={'dropout': jax.random.PRNGKey(0)}, mutable=['batch_stats'])
    loss = cross_entropy_loss(logits=logits, labels=labels)
return loss, (logits, batch_stats)Check our JAX loss functions tutorial.
Compute Flax metrics
Using the loss function, define a function that will return the loss and accuracy during training.
def compute_metrics(*, logits, labels):
  loss = cross_entropy_loss(logits=logits, labels=labels)
  accuracy = jnp.mean(jnp.argmax(logits, -1) == labels)
  metrics = {
      'loss': loss,
      'accuracy': accuracy,
  }
  return metrics
Create Flax training state
Flax provides a training state for storing training information. In this case, we add the batch_stats information.
class TrainState(train_state.TrainState):
    batch_stats: FrozenDict

state = TrainState.create(
    apply_fn = model.apply,
    params = variables['params'],
    tx = optimizer,
    batch_stats = variables['batch_stats'],
)
Training step
The training step receives the images and labels and computes the gradient with respect to the model parameters. It then returns the new state and the model metrics.
@jax.jit
def train_step(state: TrainState,images, labels):
  """Train for a single step."""
  (batch_loss, (logits, batch_stats)), grads= jax.value_and_grad(compute_loss, has_aux=True)(state.params,state.batch_stats, images,labels)
  state = state.apply_gradients(grads=grads)
  metrics = compute_metrics(logits=logits, labels=labels)
  return state, metrics
To train the network for one epoch, loop through the training data while applying the training step.
def train_one_epoch(state, dataloader):
    """Train for 1 epoch on the training set."""
    batch_metrics = []
    for cnt, (images, labels) in enumerate(dataloader):
        images = images / 255.0
        state, metrics = train_step(state, images, labels)
        batch_metrics.append(metrics)

    batch_metrics_np = jax.device_get(batch_metrics)
    epoch_metrics_np = {
        k: np.mean([metrics[k] for metrics in batch_metrics_np])
        for k in batch_metrics_np[0]
    }
    return state, epoch_metrics_np
Evaluation step
The model evaluation steps accept the test labels and images and applies them to the network. It then returns the model evaluation metrics. During evaluation, set the train parameter to False. You'll also define the batch_stats and the random number for the dropout layer.
@jax.jit
def eval_step(batch_stats, params, images, labels):
    logits = model.apply({'params': params,'batch_stats': batch_stats}, images, train=False,rngs={'dropout': jax.random.PRNGKey(0)})
    return compute_metrics(logits=logits, labels=labels)

def evaluate_model(state, test_imgs, test_lbls):
    """Evaluate on the validation set."""
    metrics = eval_step(state.batch_stats,state.params, test_imgs, test_lbls)
    metrics = jax.device_get(metrics)
    metrics = jax.tree_map(lambda x: x.item(), metrics)
    return metrics
Train ResNet model in Flax
Train the ResNet model by applying the train_one_epoch function for the desired number of epochs. This is a few epochs since we are fine-tuning the network.
Set up TensorBoard in Flax
To monitor model training via TensorBoard, you can write the training and validation metrics to TensorBoard.
from torch.utils.tensorboard import SummaryWriter
import torchvision.transforms.functional as F
logdir = "flax_logs"
writer = SummaryWriter(logdir)Check our How to use TensorBoard in JAX & Flax tutorial.
Train model
Define a function to train and evaluate the model while writing the metrics to TensorBoard.
(test_images, test_labels) = next(iter(validation_loader))
test_images = test_images / 255.0

training_loss = []
training_accuracy = []
testing_loss = []
testing_accuracy = []

def train_model(epochs):
    for epoch in range(1, epochs + 1):
        train_state, train_metrics = train_one_epoch(state, train_loader)
        training_loss.append(train_metrics['loss'])
        training_accuracy.append(train_metrics['accuracy'])

        test_metrics = evaluate_model(train_state, test_images, test_labels)
        testing_loss.append(test_metrics['loss'])
        testing_accuracy.append(test_metrics['accuracy'])

        writer.add_scalar('Loss/train', train_metrics['loss'], epoch)
        writer.add_scalar('Loss/test', test_metrics['loss'], epoch)

        writer.add_scalar('Accuracy/train', train_metrics['accuracy'], epoch)
        writer.add_scalar('Accuracy/test', test_metrics['accuracy'], epoch)

        print(f"Epoch: {epoch}, training loss: {train_metrics['loss']}, training accuracy: {train_metrics['accuracy'] * 100}, validation loss: {test_metrics['loss']}, validation accuracy: {test_metrics['accuracy'] * 100}")
    return train_state
Run the training function.
trained_model_state = train_model(config["N_EPOCHS"])
Save Flax model
Use the save_checkpoint to save a trained Flax model.
from flax.training import checkpoints
ckpt_dir = 'model_checkpoint/'
checkpoints.save_checkpoint(ckpt_dir=ckpt_dir,
                            target=trained_model_state,
                            step=100,
                            prefix='resnet_model',
                            overwrite=True
                           )
Load saved Flax model
A saved Flax model is loaded using the restore_checkpoint method.
loaded_model = checkpoints.restore_checkpoint(
                                             ckpt_dir=ckpt_dir,
                                             target=state,
                                             prefix='resnet_model'
                                            )

loaded_model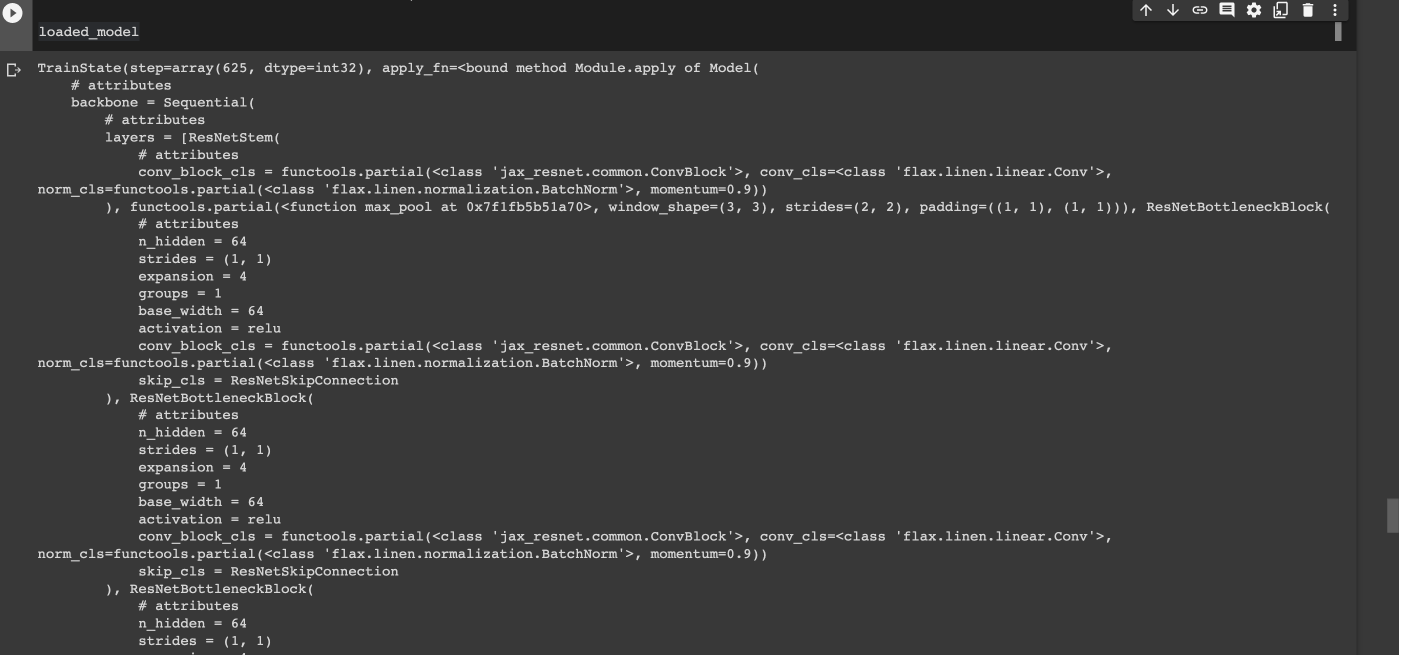
Evaluate Flax ResNet model
To evaluate a Flax model, pass the test and training data to the evalaute_model function.
evaluate_model(loaded_model,test_images, test_labels)
Visualize model performance
You can check the network's performance via TensorBoard or plot the metrics using Matplotlib.
Final thoughts
You can apply transfer learning to take advantage of pre-trained models and get results with minimal effort. You have learned how to train a ResNet model in Flax. Specially, you have covered:
- How to define the ResNet model in Flax.
- How to freeze the layers of the ResNet network.
- Training a ResNet model on custom data in Flax.
- Saving and loading a ResNet model in Flax.
Want to dive deeper into JAX and Flax? Here are some more resources from our blog:
- What is JAX?
- Flax vs. TensorFlow
- JAX loss functions
- Activation functions in JAX and Flax
- Optimizers in JAX and Flax
- How to load datasets in JAX using TensorFlow
- Building Convolutional Neural Networks in JAX and Flax
- Distributed training in JAX
- Using TensorBoard in JAX and Flax
- LSTM in JAX & Flax
- Elegy (High-level API for deep learning in JAX & Flax)
Follow us on LinkedIn, Twitter, GitHub, and subscribe to our blog, so you don't miss a new issue.